Running Local LLMs with Web Search Using Ollama and Open WebUI
Aug 17, 2024
Running large language models (LLMs) on your local machine can be pretty cool. Not only do you get more control, but you also avoid the privacy concerns and potential lags that come with cloud-based solutions. If you're ready to take the plunge into local LLMs, I'll walk you through how to set up and run models like Gemma2, Llama3.1, and Phi 3.5 using Ollama, and then spice things up with web search capabilities via Open WebUI and Pinokio.
Prerequisites
Before we dive in, here’s what you’ll need:
- A capable machine: You’ll need some serious horsepower—a modern GPU with at least 8 GB of VRAM will do, but more is always better.
- Ollama: This is your go-to command-line tool for running LLMs. You can grab it from the Ollama website.
- Pinokio: A nifty platform that helps manage AI models and tools, including Open WebUI.
Step 1: Setting Up Ollama
Ollama makes running local LLMs super easy. Here’s how you get started:
-
Install Ollama: Head over to the Ollama website, download the tool, and follow the installation instructions.
-
Download the Model: You can download your chosen model (Llama3.1, Phi 3.5, or Gemma2) from the respective official sources. Make sure you stash the model files in a directory that Ollama can access.
-
Run the Model: After downloading, fire up your terminal and run one of the following commands, depending on the model you want to use:
ollama run phi3.5
ollama run llama3.1
ollama run gemma2
Boom! You’re now running the selected model locally, and you can interact with it right from your terminal.
Step 2: Installing and Using Pinokio with Open WebUI
Now, let’s get Pinokio and Open WebUI in the mix. Pinokio is a robust platform that makes managing and running AI models straightforward, and it includes Open WebUI as part of its toolkit.
-
Download Pinokio: Visit the Pinokio website and download the app. Pinokio is your all-in-one platform for managing AI models, and it makes things super simple.
-
Install Open WebUI through Pinokio: After you’ve got Pinokio installed, use it to set up Open WebUI:
- Open Pinokio, find Open WebUI in the interface, and install it by following the on-screen instructions.
-
Run Pinokio with Open WebUI: Once everything’s set up, launch Open WebUI directly from Pinokio. It’ll provide you with a web-based interface where you can interact with your local models. Just head over to
http://127.0.0.1:42000/in your browser, and you’re good to go.
Step 3: Enabling and Using Web Search in Open WebUI
To fully unlock the potential of your local models, enabling web search will allow them to pull in real-time data from the web, enhancing their responses with up-to-date information.
1. Enable Web Search:
-
Navigate to the Admin Panel:
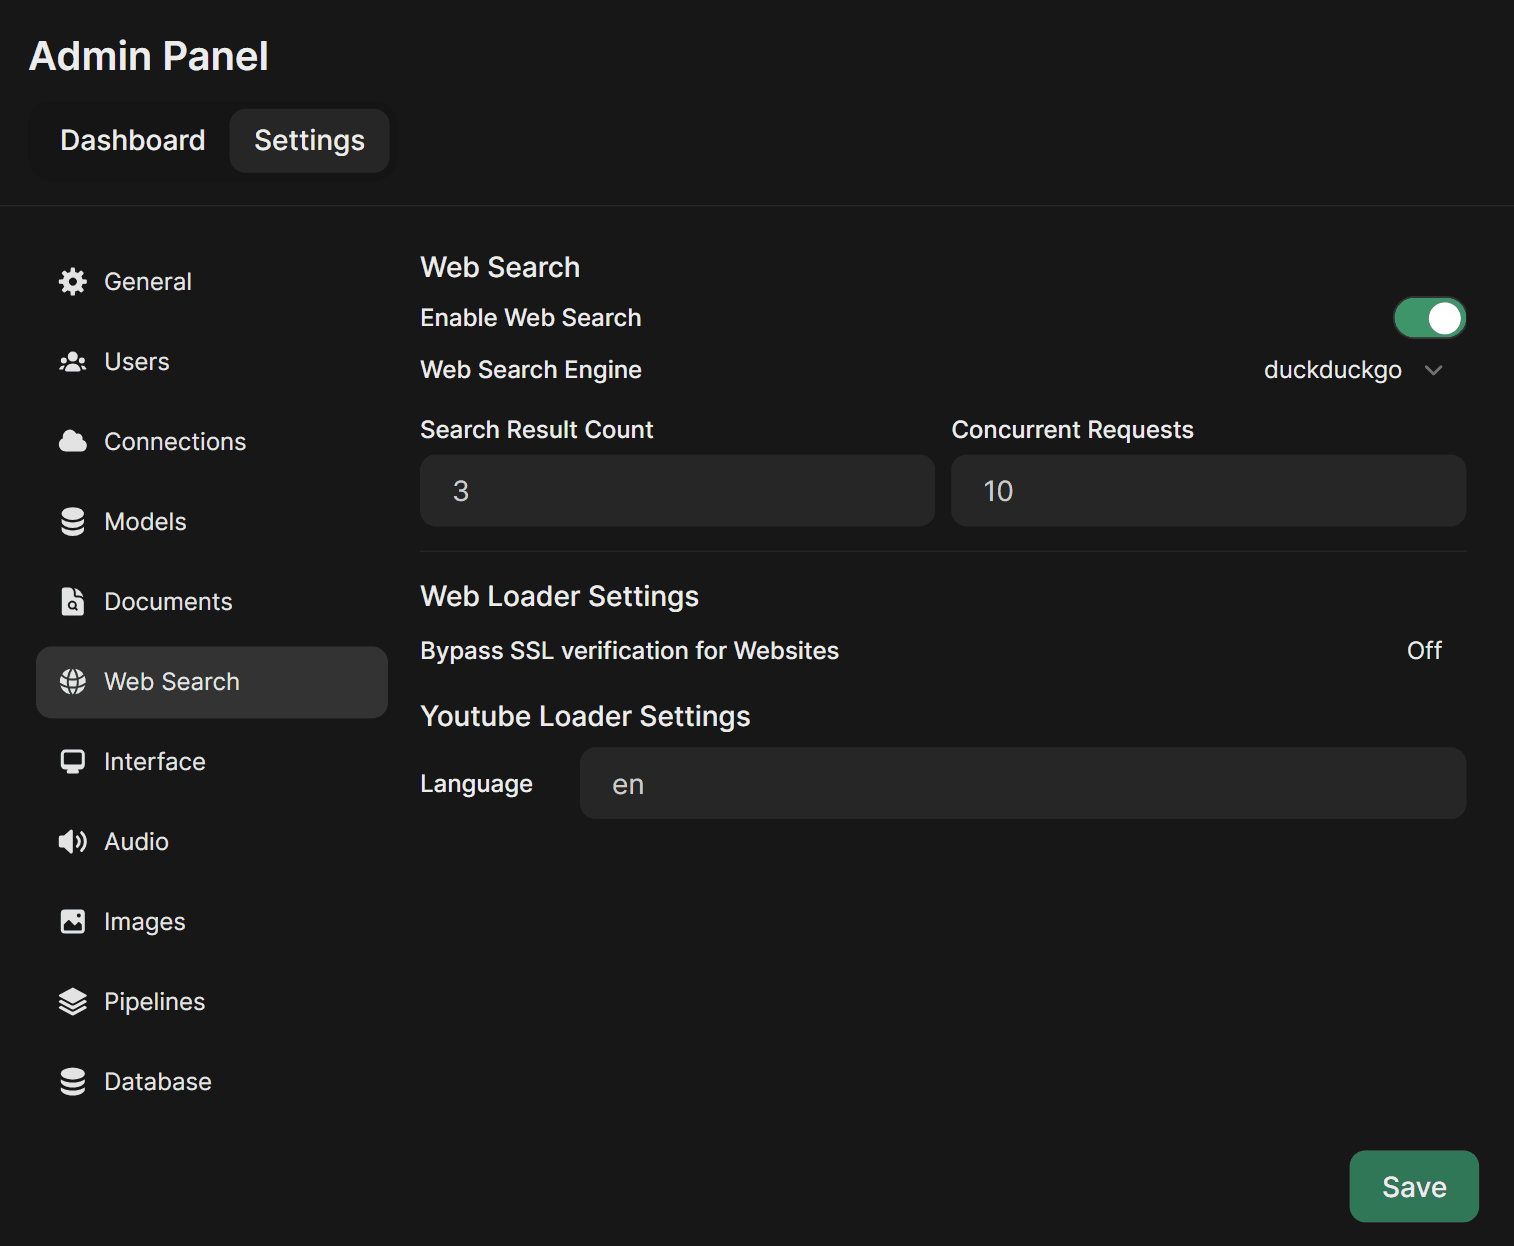
- In Open WebUI, go to the
Admin Panel->Settings->Web Search.
- In Open WebUI, go to the
-
Activate Web Search:
- Toggle the
Enable Web Searchoption to activate this feature for your models.
- Toggle the
-
Choose Your Search Provider:
- For simplicity and privacy, I recommend selecting DuckDuckGo from the
Web Search Enginedropdown menu. DuckDuckGo is known for its privacy-focused approach, making it a great choice for maintaining data privacy while fetching live web results.
- For simplicity and privacy, I recommend selecting DuckDuckGo from the
2. Using Web Search:
With web search enabled, your models can now perform live searches using DuckDuckGo. This means when you ask a query that requires current information, the model will automatically retrieve relevant data from the web, making your interactions much more informed and powerful.
-
Access the Web Search Toggle:
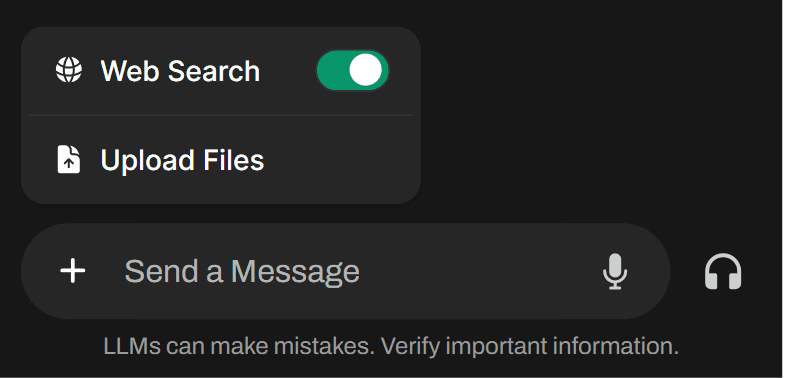
- In your chat interface, click on the
+icon next to the message input field.
- In your chat interface, click on the
-
Toggle Web Search On/Off:
- Enable or disable Web Search as needed for your current session. Note that this feature is session-specific, meaning it will turn off if you reload the page or switch to another chat.
You can further customize your settings or choose different search providers based on your needs. Open WebUI offers great flexibility in how it handles web searches, making it easy to tailor the experience to your preferences. For more detailed instructions and options, you can refer to the Open WebUI Web Search configuration guide.
Step 4: Interacting with Your Models
With everything set up, it’s time to start playing around with your models.
- Querying the Models: Enter your queries as you normally would. If the model needs extra info, it’ll use the enabled DuckDuckGo search to give you more accurate and up-to-date responses.
Conclusion
And there you have it! You’ve set up a powerful local LLM environment using Ollama, with enhanced functionality thanks to Open WebUI and Pinokio. This setup is not just simple and easy to use, but it also offers significant benefits like enhanced privacy, control, and reduced latency. Whether you're concerned about data privacy, looking to minimize latency, or just want a cloud-independent solution, this setup gives you a solid foundation to work from. Happy experimenting!